Welcome to blog.jlcarveth.dev
John L. Carveth
This is the first post on the blog setup using Deno.
What is Deno?
Deno is a modern Javascript / Typescript runtime built upon V8. Deno was built by Ryan Dahl, the creator of Node.js. Unlike Node.js, Deno supports existing web platform APIs such as fetch and the Streams API rather than creating new APIs to learn.
Deno as a Blogging Platform
Deno's simplicity is an extremely appealing feature. Installing the Deno runtime itself is a single command. Once deno is installed, initializing a blog is as simple as running the following command:
$ deno run -r --allow-read --allow-write https://deno.land/x/blog/init.ts ./directory/for/blog/That's it. A new directory is created containing a main.ts that allows for simple configuration of blog settings, a deno.jsonc file contains run commands, and the posts/ directory contains the blog posts in a markdown format.
Running deno task dev is all that's needed to deploy the blog. Deno will watch for changes and update the view immediately.
Self Hosting
Self hosting Deno was relatively simple, especially since I already have a Linux VM running on Digital Ocean. First I had to install Deno on the server, which can be done with a single command:
curl -fsSL https://deno.land/install.sh | shThe install script suggests adding deno to the PATH, which is a good idea. The following lines were added to the server's ~/.bashrc:
export DENO_INSTALL=/home/<USER>/.deno
export PATH=$DENO_INSTALL/bin:$PATH
Now that our server has access to the deno command, we could run deno task serve and call it a day. However, I tend to use service managers to facilitate starting / stopping services on a system. That way, I can ensure the deno blog starts on system startup, as well as a single command to start, stop, and check the status of the blog.
I created a blog.service file:
[Unit]
Description=Blogging platform using Deno.js

[Service]
ExecStart=/home/jlcarveth/.deno/bin/deno run --allow-net --allow-read --no-check main.ts
Restart=always
User=jlcarveth
Group=jlcarveth
WorkingDirectory=/opt/blog.jlcarveth.dev

[Install]
WantedBy=multi-user.target
The most important line is ExecStart which contains the command used by systemd to execute our service. We can also specify the user we want our process to run as, which is useful for adding read/write protections to files or other security-based restrictions.
Once the service file has been created, a symlink needs to be created on /etc/systemd/system:
sudo ln -s blog.service /etc/systemd/system/blog.serviceThat's it. The blog can now be deployed with a single command: sudo systemctl start blog.service You can check if it is running with sudo systemctl status blog.service and stop the service with sudo systemctl stop blog.service.
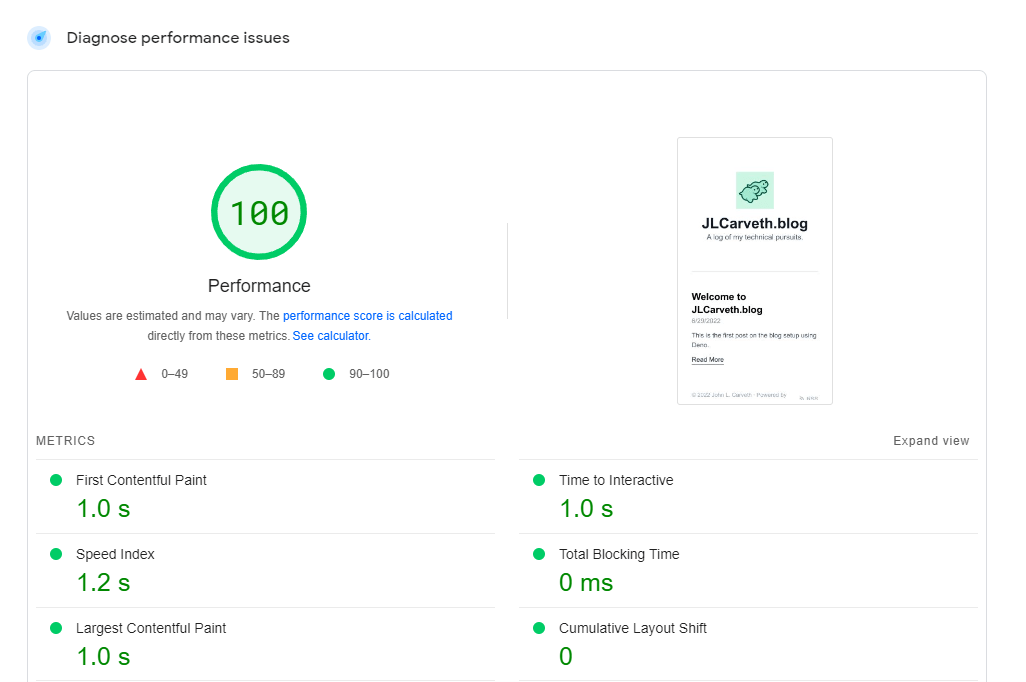
And what a nice blog it is. Testing the page on Google's PageSpeed gave this blog a perfect score!